Latest News

Blog writing tools which support Blogger
Whoever had blogger platform for their blogs might have experience lot of difficulties with its editor while writing a post r editing because of lack of options for professional writing.
There are so many third-party writing tools which support blogger, these tools give u a gr8t experience in writing posts for ur blog.

In this post I want to provide with the details for few of these tools.
1,Window Live Writer
One of the most professional blog writing tool powered by microsoft. It also support upload images in your post to image hosting services automatically. Easy to, write and publish post.
2.Zoho Writer
Online application. It provides an interface that makes saving and sharing documents easier.
3.W.bloggar
A free tool with a long feature list .
4.Elicit
A desktop blog client that integrates Web and RSS services for content recommendation .
5.RocketPost
Blog software helps serious bloggers. It’s the only blog editor with WYSIWYG editing, full local editing and full blog import. It also has a built-in photo editing, automatic linking to related posts, and other features.
6.ScribeFire
An Add-on of Firefox browser . It's a small-size blogging tool but very effective. It support manage drafts, posts, and support multiple blogs
7.Ecto
It’s one of the older editors that will run from your desktop which supports both Mac and Windows users. Manage multiple blogs, imports, categories and drafts.
8.BlogJet
A popular blog writing tool.
'add pages' function for Blogger

Like Wordpress ,Blogger now support 'add pages' function . It's an useful function for all bloggers to make about page ,or contact page and so but it is limited to 10 pages for each blog.
Once your page is published, you can link to it from the new Pages widget. The Pages widget lets you add links to your pages as tabs at the top of your blog, or as links in your blog's sidebar.
In the Pages widget, you can decide which pages to have links and which links, and in what order they will appear. You can also choose whether or not you want links automatically created for pages when you create them by checking or unchecking the box to the left of Add New Pages by Default.

NOTE: This function is unavailable in Blogger publish mode, it work only in Blogger Draft mode, and there's no information found in Blogger Buzz . It might be because Google is in the process of testing this function. So if you don't see 'add pages' link in Blogger mode (www.blogger.com ), try to login in draft mode at draft.blogger.com
Recent post dropdown widget
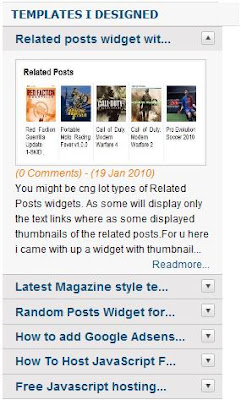
You might have seen different type of Recent post widgets showing Thumbnail with text or only text or only thumbnail. Those all widgets will show recent posts one by one in horizontal manner or vertical manner but will show all the posts. Here is a little different one which will show recent posts in a drop down manner as shown in top picture.
If you want to experience this, go to Info blog and check right side bar for the label Templates I designed.
NOTE: Please use firefox to experience this as this widget has some bug for IE with personal domain. If yyou dont use personal domain as i am using and if u have a blog address as xxxxx.blogspot.com then it will work perfectly on all browsers.
To insert this widget into ur blog follow the steps below
1) Log into ur blog and paste below code just before "]]></b:skin>"
.accordion {
float:left;
width: 260px;
border-bottom: solid 1px #c4c4c4;
}
.accordion h4 {
background: #e9e7e7 url(http://www.webdesignerwall.com/demo/jquery/images/arrow-square.gif) no-repeat right -51px;
padding: 7px 15px;
margin:0;
font: bold 120%/100% Arial, Helvetica, sans-serif;
border-top: solid 1px #c4c4c4;
border-bottom: none;
cursor: pointer;
}
.accordion h4:hover {
background-color: #e3e2e2;
}
.accordion h4.active {
background-position: right 5px;
}
.accordion p {
background: #f7f7f7;
margin: 0;
padding: 10px 15px 20px;
}
2) Now just copy and paste below code just before </head>
<script type='text/javascript'>
$(document).ready(function(){

$(".accordion h4:first").addClass("active");
$(".accordion p:not(:first)").hide();

$(".accordion h4").click(function(){
$(this).next("p").slideToggle("slow")
.siblings("p:visible").slideUp("slow");
$(this).toggleClass("active");
$(this).siblings("h4").removeClass("active");
});

});
</script>
3) Not last and final step. copy and paste below code at the place where u want to show ur widget.
<script language='JavaScript'>

imgr = new Array();
imgr[0] =
"http://sites.google.com/site/fdblogsite/Home/nothumbnail.gif";
showRandomImg = true;
jimgwidth = 220;
jimgheight = 120;
jfntsize = 12;
jacolor = "#E67C15";
jaBold = true;
jtext = "Comments";
jshowPostDate = true;
sumtitle = 25;
jsummaryPost = 200;
summaryFontsize = 12;
summaryColor = "#000";
numposts = 6;
label = "Blogger";
home_page = "http://ngsk.info/";

</script>
<div class='accordion'>

<script src='http://contact.dinhquanghuy.googlepages.com/j-label-fix.js' type='text/javascript'/>

</div>
Now change home_page url to ur blog address and label name to ur tag name.
hope u like this widget.
Related posts widget with thumbnails

You might be cng lot types of Related Posts widgets. As some will display only the text links where as some displayed thumbnails of the related posts.
For u here i came with up a widget with thumbnails which will really suits ur blogger templates and will not show duplicate entries.
to add this widget to ur blog follow these steps.
1) Login to ur blogger account and place below code exactly <Head> tag
<b:if cond='data:blog.pageType == "item"'>
<style type='text/css'>
#related-posts {
float:center;
text-transform:none;
height:100%;
min-height:100%;
padding-top:5px;
padding-left:5px;
}

#related-posts h2{
font-size: 1.6em;
font-weight: bold;
color: black;
font-family: Georgia, “Times New Roman”, Times, serif;
margin-bottom: 0.75em;
margin-top: 0em;
padding-top: 0em;
}
#related-posts a{
color:black;
}
#related-posts a:hover{
color:black;
}

#related-posts  a:hover {
background-color:#d4eaf2;
}
</style>

<script type='text/javascript'>
//<![CDATA[

//Script by Aneesh of www.bloggerplugins.org
//Released on August 19th August 2009
var relatedTitles = new Array();
var relatedTitlesNum = 0;
var relatedUrls = new Array();
var thumburl = new Array();
function related_results_labels_thumbs(json) {
for (var i = 0; i < json.feed.entry.length; i++) {
var entry = json.feed.entry[i];
relatedTitles[relatedTitlesNum] = entry.title.$t;
try
{thumburl[relatedTitlesNum]=entry.media$thumbnail.url;}


catch (error){
s=entry.content.$t;a=s.indexOf("<img");b=s.indexOf("src=\"",a);c=s.indexOf("\"",b+5);d=s.substr(b+5,c-b-5);if((a!=-1)&&(b!=-1)&&(c!=-1)&&(d!="")){
thumburl[relatedTitlesNum]=d;} else thumburl[relatedTitlesNum]='https://blogger.googleusercontent.com/img/b/R29vZ2xl/AVvXsEinbmlBXdPt2jaZvh7OFc8OJ2pqNc9x4d0VOskkO3ghQbs88u6LmEnx2MMcJzwGIk1tgOBebbAdYh7EZ7lkOuzKzXWGFmEQ0Wk6B-bPf7lmdFQWy-0DAWyikhD8Cmk7TP7xYj-XQ9Y3gCVK/';


}

if(relatedTitles[relatedTitlesNum].length>35) relatedTitles[relatedTitlesNum]=relatedTitles[relatedTitlesNum].substring(0, 35)+"...";
for (var k = 0; k < entry.link.length; k++) {
if (entry.link[k].rel == 'alternate') {
relatedUrls[relatedTitlesNum] = entry.link[k].href;
relatedTitlesNum++;


}
}
}
}
function removeRelatedDuplicates_thumbs() {
var tmp = new Array(0);
var tmp2 = new Array(0);
var tmp3 = new Array(0);
for(var i = 0; i < relatedUrls.length; i++) {
if(!contains_thumbs(tmp, relatedUrls[i]))
{
tmp.length += 1;
tmp[tmp.length - 1] = relatedUrls[i];
tmp2.length += 1;
tmp3.length += 1;
tmp2[tmp2.length - 1] = relatedTitles[i];
tmp3[tmp3.length - 1] = thumburl[i];
}
}
relatedTitles = tmp2;
relatedUrls = tmp;
thumburl=tmp3;


}

function contains_thumbs(a, e) {
for(var j = 0; j < a.length; j++) if (a[j]==e) return true;
return false;
}
function printRelatedLabels_thumbs() {
for(var i = 0; i < relatedUrls.length; i++)
{
if((relatedUrls[i]==currentposturl)||(!(relatedTitles[i])))
{
relatedUrls.splice(i,1);
relatedTitles.splice(i,1);
thumburl.splice(i,1);

}
}


var r = Math.floor((relatedTitles.length - 1) * Math.random());
var i = 0;

if(relatedTitles.length>0) document.write('<h2>'+relatedpoststitle+'</h2>');
document.write('<div style="clear: both;"/>');
while (i < relatedTitles.length && i < 20 && i<maxresults) {


document.write('<a style="text-decoration:none;padding:5px;float:left;');
if(i!=0) document.write('border-left:solid 0.5px #d4eaf2;"');
else document.write('"');
document.write(' href="' + relatedUrls[r] + '"><img style="width:72px;height:72px;border:0px;" src="'+thumburl[r]+'"/><br/><div style="width:72px;padding-left:3px;height:65px;border: 0pt none ; margin: 3px 0pt 0pt; padding: 0pt; font-style: normal; font-variant: normal; font-weight: normal; font-size: 12px; line-height: normal; font-size-adjust: none; font-stretch: normal;">'+relatedTitles[r]+'</div></a>');


if (r < relatedTitles.length - 1) {
r++;
} else {
r = 0;
}
i++;
}
document.write('</div>');

}

//]]>
</script>

</b:if>
2) Now just place below code at the place where u want to show ur related posts, may be at sidebar and mostly u will like to past it at the fotter of the post.
<b:if cond='data:blog.pageType == "item"'>
<div id='related-posts'>
<b:loop values='data:post.labels' var='label'>
<b:if cond='data:label.isLast != "true"'>
</b:if>
<b:if cond='data:blog.pageType == "item"'>
<script expr:src='"/feeds/posts/default/-/" + data:label.name + "?alt=json-in-script&callback=related_results_labels_thumbs&max-results=6"' type='text/javascript'/></b:if></b:loop><a href='http://www.bloggerplugins.org/2009/08/related-posts-thumbnails-blogger-widget.html' style='display:none;'>Related Posts with thumbnails for blogger</a><a href='http://www.bloggerplugins.org/' style='display:none;'>blogger tutorials</a>
<script type='text/javascript'>
var currentposturl="<data:post.url/>";
var maxresults=5;
var relatedpoststitle="Related Posts";
removeRelatedDuplicates_thumbs();
printRelatedLabels_thumbs();
</script>
</div><div style='clear:both'/>
</b:if>
Latest Magazine style template
Install instruction
1.Download this template . Unzip it . You will get a template file in xml format and a folder for images .
2.Upload all images to a hosting service like photobucket .
3.Open the template file ,change all link of images in CSS section to your images link.
4.Change all link of my blog : http://ngshivakumar.blogspot.com to your blog link .
I suggest using Notepad++ for editing template and finding links to change . It's easier than using Blogger editor .
5. The code of top navigation bar here :
<!--top navigation bar-->
<div class='headline'>
<strong class='fl'><a href="#">About me</a></strong>
</div>
<div class='headline'>
<strong class='fl'><a href="#">Contact</a></strong>
</div>
<div class='headline'>
<strong class='fl'><a href="#">Link Exchange</a></strong>
</div>
and edit them accordingly .
6.Find this code
<div class='subcribe_box'>

<form action='http://feedburner.google.com/fb/a/mailverify' method='post' onsubmit='window.open('http://feedburner.google.com/fb/a/mailverify?uri=Simplex&loc=en_US', 'popupwindow', 'scrollbars=yes,width=550,height=520');return true' style='margin: -5px 0pt 0pt; padding: 0px; text-align: center;' target='popupwindow'>

<h2>Subscribe to SimplexDesign</h2>
<p> Receive New Articles As They are Posted</p>
<div style='float: left; padding-left: 10px;'>
<input name='email' style='padding: 2px 5px; width: 200px;' type='text'/>
<input name='uri' type='hidden' value='Simplex'/>
<input name='loc' type='hidden' value='en_US'/>
<input type='submit' value='Go'/>
</div>

<div style='clear: both; height: 5px;'/>
</form>
</div>
</div>
and replace link of feed to your blog feed link .
7.Code of recent posts and recent comments :
<div id='tabs2'>
<ul>
<script src='http://simplexdesign.blogspot.com/feeds/posts/default?max-results=5&orderby=published&alt=json-in-script&callback=showrecentposts1'>
</script>
</ul>
</div>
<div id='tabs1'>
<ul>

<script src="http://simplexdesign.blogspot.com/feeds/comments/default?alt=json-in-script&callback=showrecentcomments">
</script>
</ul>
</div>
Change http://ngshivakumar.blogspot.com to your blog link .Save template and upload it to blogger .8. Go to Layout ,click on Page elements tab .
Linklist widget is available for navigation of your blog ,you can add link to blog navigation bar by adding link in this widget. Click on edit button and add links
This is a primary design from Simplex pro advance, after making so many changes i made this template.
only one request if u like my work please add credits at the bottom.